The minion costume idea I found made goggles from styrofoam cups. As I didn't have any on hand and forgot to grab a couple from the event I attended the evening of the 17th, I figured I'd have to buy a package of them. Said package, even the smallest amount sold, would sit, under the sink or in the basement for years, yes, years, before being completely used. I checked under the sink just in case I had a couple I'd forgotten about but no, no styrofoam cups. I found a stack of a dozen of these, however.
They will work just fine.
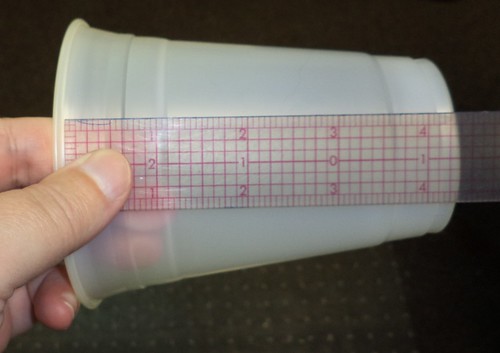
I measured the length from the lip to the edge of the ring. Then, I put a slice into the middle of the cup and used a scissors to remove all but the top inch of the cup. I found you'll need to make slices in the side so it's easier to remove the cup body.
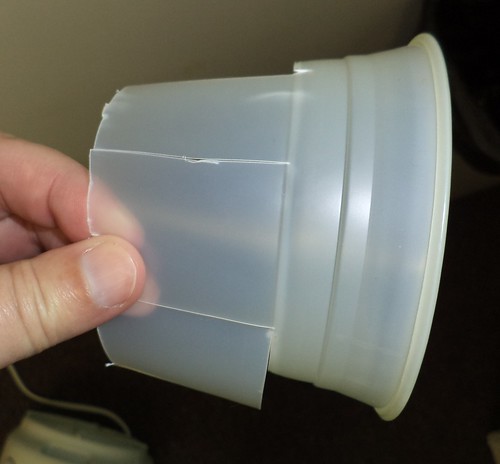
Once you've cut away all the cup except the top inch or so, you're left with a nifty ring that is just the right size.

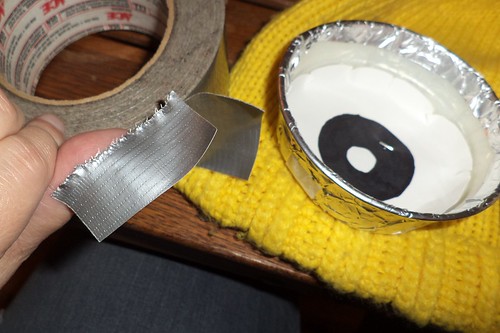
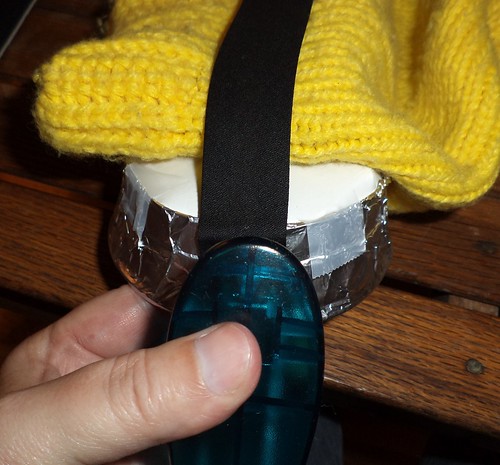
The goggle instructions said to use a silver marker and color the styrofoam. Well, these kinds of cups don't take marker very well so I hit on the idea of covering the edge with aluminum foil. Using the measurement of the width of this ring, I took a piece of foil the length of the circumference of the cup.
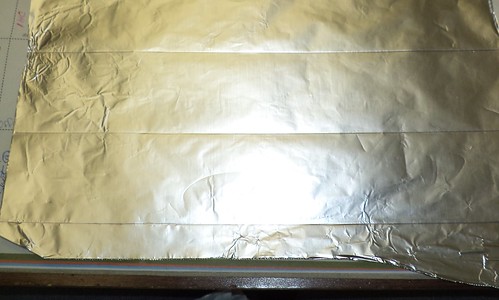
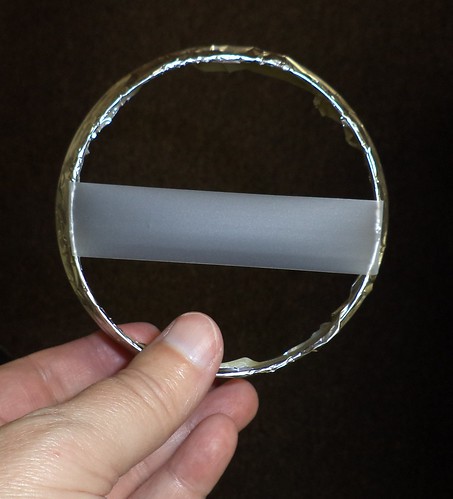
I measured the width of the ring and added another inch to that measurement and cut two pieces, one for each goggle. I wrapped that length of foil around the rings, keeping the ring in the center of the foil. As I worked, I folded down the top half inch of foil over the edge of the ring and then did the same with the bottom edge. When you're done, you'll have two rings that look like this.

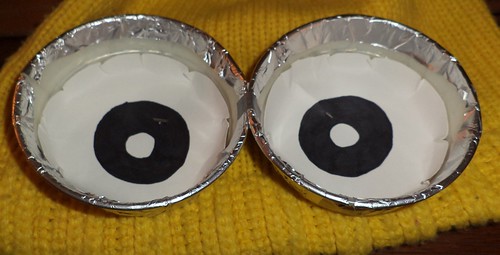
Now you need eyes. I took two paper plates and traced around the largest part of the rings and cut that out. I didn't have a compass at work so I was going to measure the inside iris and pupil, but, in looking about my desk, I found an aspirin bottle and an eraser were the right sizes so I traced around each. Then I colored in the iris with marker.

When this was done, I started to stick one eye into one of the goggles. You'll need to bend it around the edges just a bit to get it into the ring. It kept popping out until I had the thought to anchor the eye to a piece of tape strung across the back of the ring.
It still took a bit of force as a paper plate is rather stiff, but once a section of an eye was stuck to the tape, I added another piece across the first piece at a right angle. This was just enough tape to hold the eye in place.
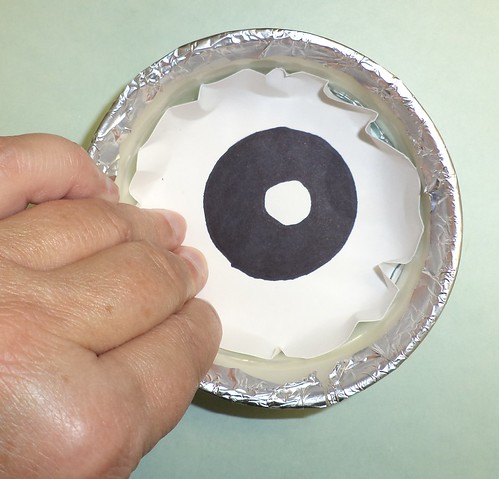
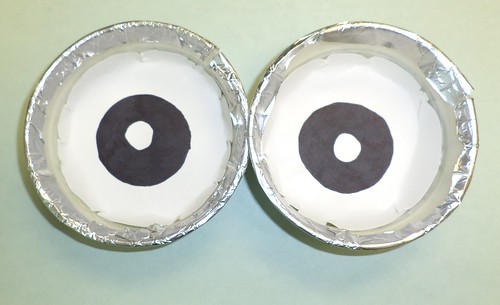
You want to push the eye down onto the tape and then work around the edges, folding them up against the ring. When you're done, you'll have a couple of eyes that look like this.
Now, position the eyes on your hat.
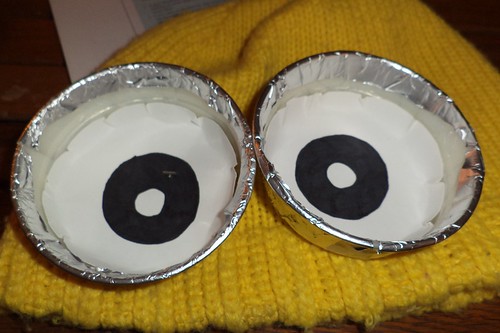
On a beret like this, I could place the eyes pretty much any place I chose since the hat is almost a circle. Take a couple of safety pins, I used the largest I could find, and safety pin the goggles to the hat.
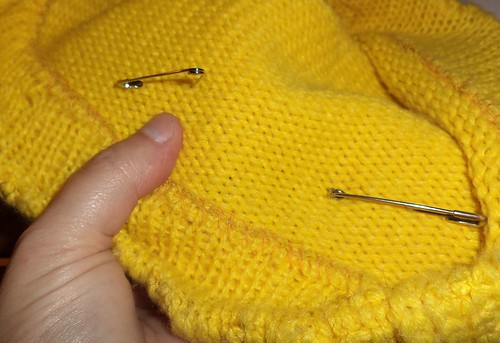
I made sure the pins went through the iris. They are almost invisible on the front.
One of the problems with the eyes is that on a hat like this, they won't stick together. In trying the hat on, I had one eye pointed one way and the other looking a different way, owing to the stretching of the knit.

I solved that problem with the omnipresent duct tape.
I cut a strip about a half inch long. That was folded in half and affixed to the exterior of the eyes, right were the bridge of the nose would be.
Another small piece was affixed to the front of the goggles right at the bridge of the nose, kind of like the running joke about fixing one's glasses with duct tape.
The small strip is almost invisible against the aluminum foil.
Now to make the goggle "strap". Here's where being a pack rat is extremely helpful. Given that I waited until the sort of last minute to finish this, and the car was in the shop last night, and it was pouring rain, and it was late, what could I use for a strap? I thought about the extra black velvet but that would require seaming and I didn't want to dig out the sewing maching because I'd put it away after making the bib the night before. As I was eating supper, it hit me. Viola.
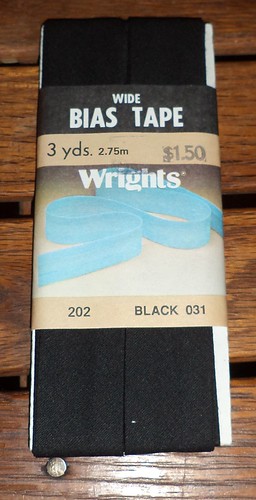
I had an unopened package of wide bias tape in black. Even though Iowa's colors are black and yellow, I do not want to sew this tape onto the knit hat. The stretchy quality of the hat will tear any stitching I could do, even hand stitching. So, I utilized safety pins.
I put on the hat and wrapped the tape from goggle to goggle, adding an inch on either side. With that hunk of trim, I put one edge up against the goggle and wrapped the rest around the hat. The trim is safety pinned from the back adjacent to the eye and in the back middle. This allows the hat to stretch over my head without breaking any stitching or ruining the hat.
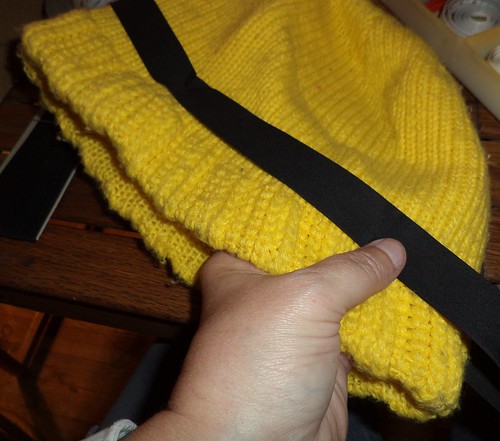
The ends of the trim are folded up onto the side of the each goggle and stapled to the side to they look like they are adjustable. (Finding the stapler was an adventure in and of itself. I'm thinking I don't need all the stuff in that bin.)
The end result is something close to a minion's head.

Plus, all the pieces come off the hat and can be saved for next year. The bias tape can be cut off the goggles and that piece used for something else. These instructions can be used whether you are making the goggles or the monacle.
I hope you've enjoyed these instructions. The look on faces of the staff, my doctor and the two kids in the elevator were priceless and it was an inexpensive costume to make. If there is something else you'd like to know to make the costume for yourself, just ask.
Beverage: Dr Pepper
Deb
No comments:
Post a Comment