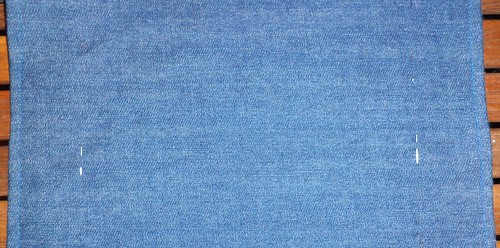
The next step was to pull out the denim and figure out how to make a bib. The denim hunk was 60 inches wide so I cut it in half. Then I realized it wasn't square.

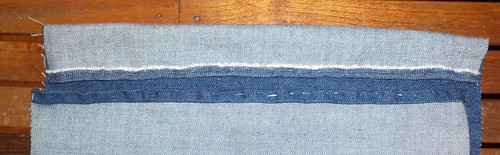
Notice the top edge. It's wider at the left than at the right. I was going to have to square up the hunk before stitching or it would be a mess. I've been sewing a long, long time. When I first started learning the basics, fabric could not be counted on to be square. For those who don't sew, it has to square because of the natural stretch in any fabric. If the horizontal and vertical threads do not form a right angle, you'll never get something to hang right. When I was learning, we used to take one horizontal thread and pull it all the way through the fabric, creating an empty line, if you will. This became your cutting line. If you had any doubts about the selvage edge, which is the edge that comes off the loom, the above left in the photo, you needed to do that to the vertical edge. When you cut on those lines, you had a squared piece of fabric and could commence the business of cutting your pattern pieces.
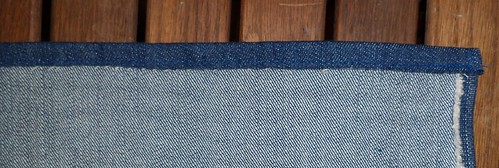
In this case, the natural straightness of the table on which I'm working made it easy to see how to square up the fabric piece. I put the one edge that came out square along one slat and then cut along the other slat.

Ta da! Squared enough for my purposes.
When this was done, I folded up the selvage edges to make seams. All the edges of this fabric are seamed with 1/2 inch seams. I probably didn't need to, but I thought it would just look better.
The one edge that was from the loom, the selvage edge, at the top in this photo, was only turned up once. The other edge, where I cut the piece in half, was folded and folded again. These were stitched.
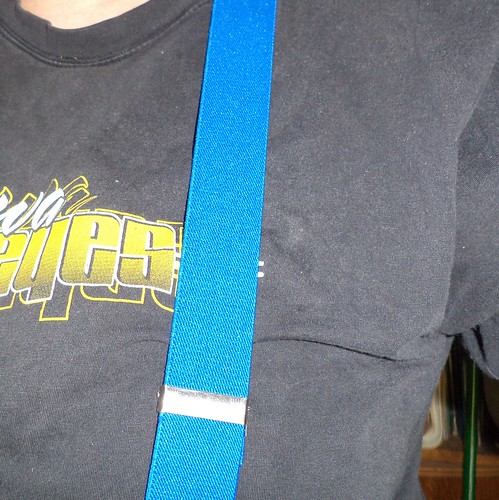
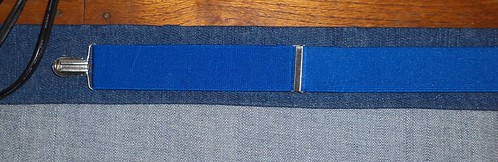
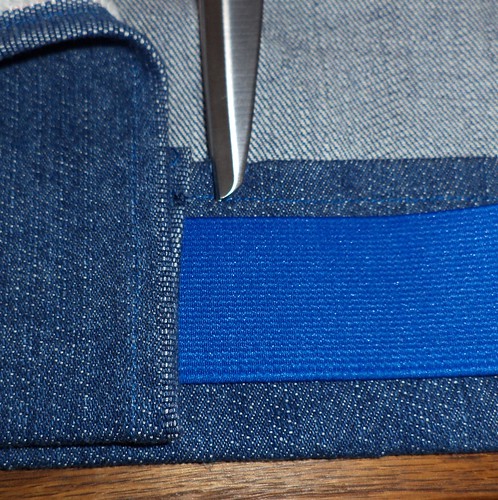
Then, I moved to each side. I measured 1/2 inch and stitched that seam on both sides. I decided to make a casing for the suspenders since the fabric was adequately wide enough, so there is no need to turn this seam in again.
Once the side seams were sewn, I measured with the suspender to be certain.
See what I'm aiming for here? If you look at a minion's overalls, they have a visible side seam running up the bib. If I chose to attach the denim to the bib, it would tear when the suspenders stretched, probably ruining both the suspenders and the denim. I'm going to make a casing through which the suspenders will go, and which will leave me room to stitch a seam that approximates the stitching on the minion's overalls. I measured the width of the suspenders and the current seam and then added 1/2 inch for the casing. This was then marked with pins on the front of the fabric.
I'm crazy like this but, if you're following along, lay the suspenders on the front of the fabric and check your measurements again.

The fabric was folded to the inside and pressed along the pin line.

Once both sides were pressed, I again laid the suspenders over the soon to be casing just to be certain of the width before anything was sewn.
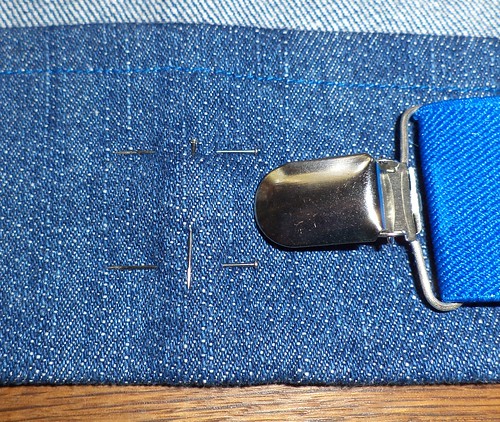
Now comes a measurement part that I got off. The fabric hunk was cut in half. It was still really long for my bib. I measured myself from where I wanted the top of the bib to be, down to my pant top. Using that measurement, I would have over half of the fabric not needed. I hit upon the idea to fold that excess up and make a buttonhole at the fold. The business end of the suspenders would come through the buttonhole so there was less of a gap between the top of my pants and the bib. So, I folded up the fabric and marked where the buttonhole would go.

On the top side, I marked where the buttonhole was to go and how wide I wanted it.
Then, I took a deep breath and made buttonholes. I have never been very good at doing this. If I sewed more, I'd probably get reasonably good at it but making them bothers me. They turned out okay and aren't seen in the final bib.

Once the buttonhole was opened up, I threaded the suspender through just to make sure it was wide enough.
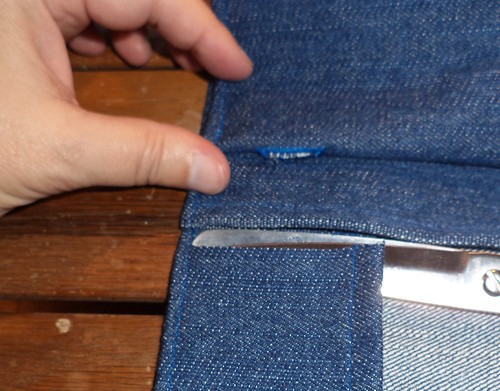
You can see how the fabric is folded up. It occurred to me, at this point, that the suspenders were lying on the top of the fabric and I had just made a buttonhole through all the fabric. Um...I can't sew the suspenders to the bib. My heart sank. What to do?
Then I had an aha moment. I would snip through the top part of the casing. Then, when the suspenders are threaded through the top casing, I can pull them out and push them into the right part of the bottom of the bib to come out through the buttonhole.
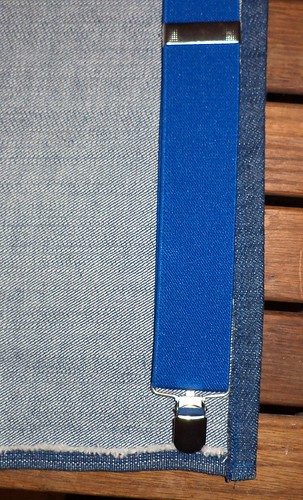
Once this snipping point was figured out, I ironed the fabric again to set the fold and sewed the outside seam first.

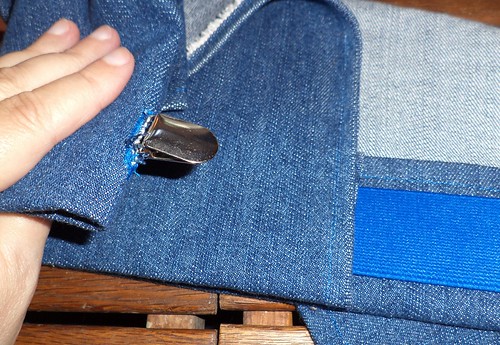
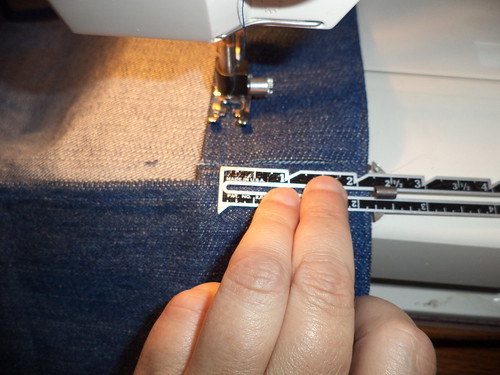
You can see, I'm close to the eye of the presser foot and the edge of the fabric. This seam is sewed top to bottom. When the outside seam was completed, I snipped above the top of the folded fabric to the line of outside stitching. You need enough of a hole to allow you to move the suspenders into the right part of the folded up fabric so the clasp comes out the buttonhole.
Then, I measured from the sewn seam back toward the middle. This is to make the seam line for the interior edge of the casing.
Happily, it was almost the same as the seam line for the original hem. I stitched that seam top to bottom. When that was done, I did a mental drumroll and started threading one side into the casing.
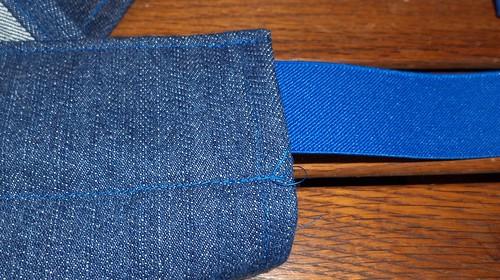
So far so good.
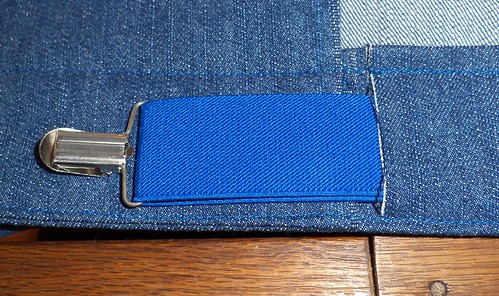
And, it worked.

I did have to pull the suspender out of the bottom casing and put it in again. Because of the folded fabric, for some reason, not all the layers let me push the end through the buttonhole. Threading the suspenders through the folded part of the casing, because there is more fabric there, was a bit difficult and I had to work in 1/2 inch increments. Fortunately, there wasn't much fabric to go before the clasp popped out of the buttonhole.
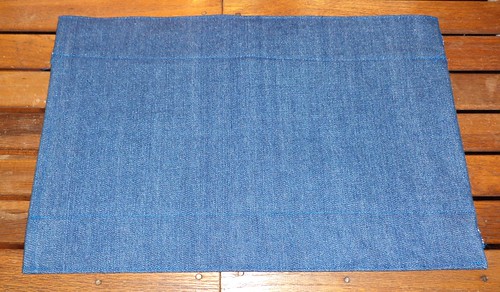
Here's the back side of the bib, now completed.

Here is the front side.
As you can see from the top photo, the bib is a bit long. Because I'm going to save this, I think I will lop off the bottom 3 inches, cover the exposed ends with bias tape and put the buttonholes in the tape. I'll still have the same effect but at the right length for the bib.
We're not done yet. The next post deals with the decal.
Beverage: Dr Pepper
Deb
No comments:
Post a Comment