A little over a month ago, I had a rheumatologist appointment. She wanted to see me in a month and I realized that would be close to Halloween. So, I made my next appointment for Halloween and, in a fit of madness, said I'd come in costume. You might remember me posting about this.
I did some thinking and some Internet research. One of my favorite movies is Despicable Me. As I was thinking about what I could be, I sat down with a crochet scarf project and popped in the movie. It suddenly occurred to me. I could go as a minion.
How hard could this be? Having decided upon the idea, I set about to make it happen.
The minions wear overalls. I have no need of a pair of denim overalls, but, I did check to see what they might cost. $60 was the cheapest pair I could find in my size. No thank you. That alone is over the $40 limit I set for myself in making this costume. Then, I hit on the idea of making a bib and attaching it to a pair of jeans I already have. I could make the emblem the minions have on the top of their bibs and make a pair of goggles. I already had a pair of black gloves.
In early October, all the pieces were procured. A hunk of denim cost me $4.50. The black fabric for the emblem cost $3.50. I bought a pair of blue suspenders at Party City for $7.00. I found a long-sleeve yellow knit shirt for $8.00 in banana color. (If you don't know why that color is important, here's the link. The first 40 seconds is all you need to watch to get the gist of why 'banana' is important.) Everything else, I had. For $25, I had a costume that was trendy, thanks to the second version of the movie coming out in the summer.
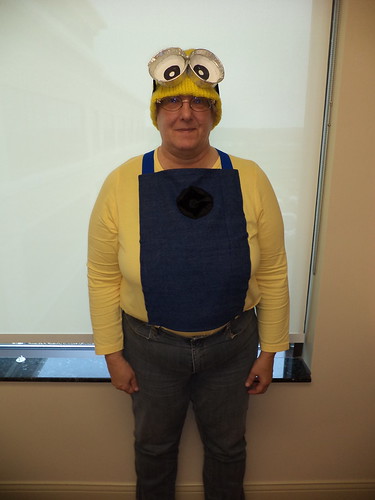
The reaction today at the doctor's office was priceless. I honestly think they did not expect me to show up in costume and some of them had forgotten that I said I would. Everyone knew what I was trying to be. My boss didn't. I had to ask if my costume would "Grue" on him and then he said, "OH! Yeah! You're a minion!". The shirt I will keep and will wear again. It's very comfortable and, in the depths of winter, will be great to layer over a turtleneck.
Here is the finished result, taken at the doctor's office.
I forgot to bring my black gloves because it's in the mid 60's today and I didn't need them. As I rode up in the elevator to the 5th floor, I had to tuck my hair up into the hat. There were a couple of kids in the elevator with me and they got a kick out of me becoming a minion.
So, this was very successful. If you'd like to see how to recreate this, there are three posts below. I'm going to hang onto this. It has potential for another year.
Beverage: Dr Pepper
Deb
Thursday, October 31, 2013
Halloween 2013
Labels:
clothes,
costume,
craft,
Dr. Francis,
Halloween,
humor,
money,
movie,
Rheumatoid Arthritis,
sewing,
weather
So You Want to Be a Minion - Halloween Costume 2013
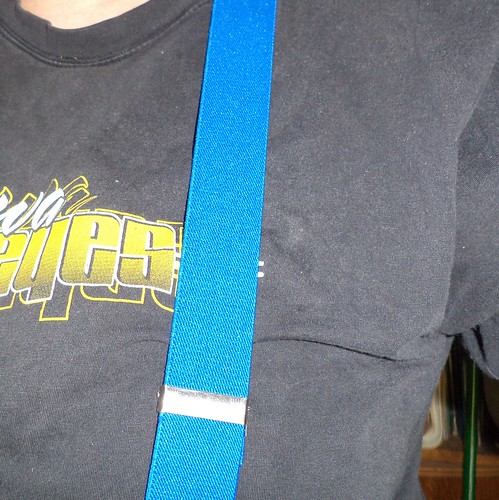
After I decided what to make, it became a question of how. I tried on the suspenders just to see if these were going to work. Huzzah! They work perfectly. They are actually quite comfortable for being a Halloween costume novelty.
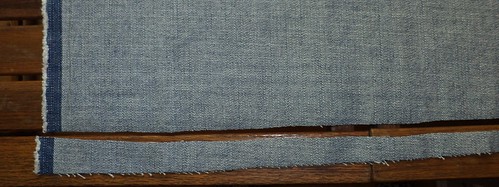
The next step was to pull out the denim and figure out how to make a bib. The denim hunk was 60 inches wide so I cut it in half. Then I realized it wasn't square.
Notice the top edge. It's wider at the left than at the right. I was going to have to square up the hunk before stitching or it would be a mess. I've been sewing a long, long time. When I first started learning the basics, fabric could not be counted on to be square. For those who don't sew, it has to square because of the natural stretch in any fabric. If the horizontal and vertical threads do not form a right angle, you'll never get something to hang right. When I was learning, we used to take one horizontal thread and pull it all the way through the fabric, creating an empty line, if you will. This became your cutting line. If you had any doubts about the selvage edge, which is the edge that comes off the loom, the above left in the photo, you needed to do that to the vertical edge. When you cut on those lines, you had a squared piece of fabric and could commence the business of cutting your pattern pieces.
In this case, the natural straightness of the table on which I'm working made it easy to see how to square up the fabric piece. I put the one edge that came out square along one slat and then cut along the other slat.
Ta da! Squared enough for my purposes.
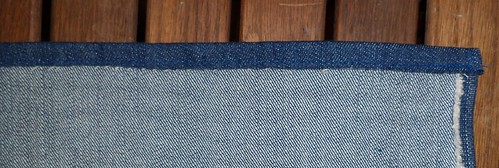
When this was done, I folded up the selvage edges to make seams. All the edges of this fabric are seamed with 1/2 inch seams. I probably didn't need to, but I thought it would just look better.
The one edge that was from the loom, the selvage edge, at the top in this photo, was only turned up once. The other edge, where I cut the piece in half, was folded and folded again. These were stitched.
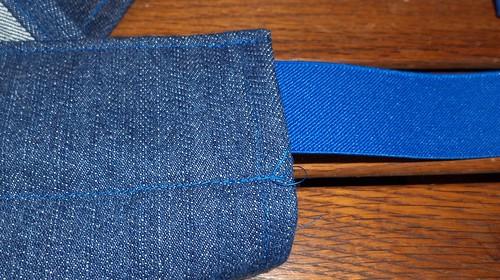
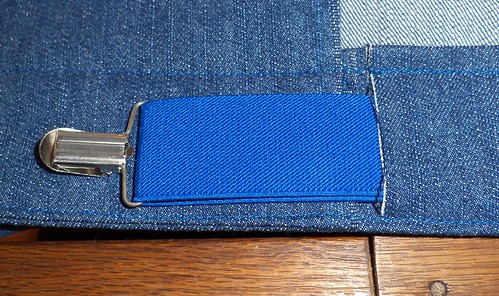
Then, I moved to each side. I measured 1/2 inch and stitched that seam on both sides. I decided to make a casing for the suspenders since the fabric was adequately wide enough, so there is no need to turn this seam in again.
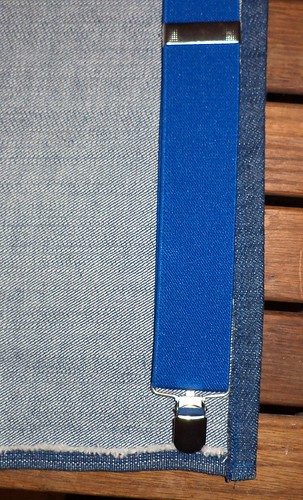
Once the side seams were sewn, I measured with the suspender to be certain.
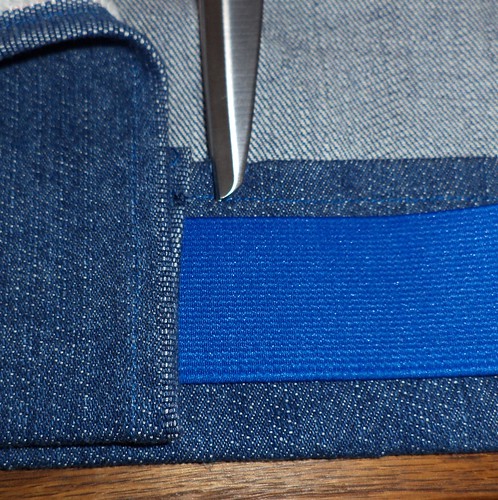
See what I'm aiming for here? If you look at a minion's overalls, they have a visible side seam running up the bib. If I chose to attach the denim to the bib, it would tear when the suspenders stretched, probably ruining both the suspenders and the denim. I'm going to make a casing through which the suspenders will go, and which will leave me room to stitch a seam that approximates the stitching on the minion's overalls. I measured the width of the suspenders and the current seam and then added 1/2 inch for the casing. This was then marked with pins on the front of the fabric.
I'm crazy like this but, if you're following along, lay the suspenders on the front of the fabric and check your measurements again.
The fabric was folded to the inside and pressed along the pin line.
Once both sides were pressed, I again laid the suspenders over the soon to be casing just to be certain of the width before anything was sewn.
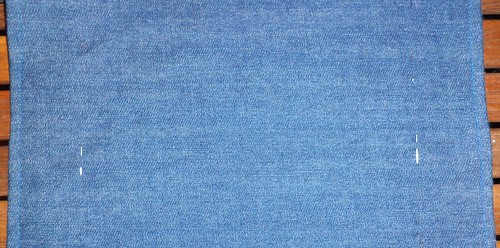
Now comes a measurement part that I got off. The fabric hunk was cut in half. It was still really long for my bib. I measured myself from where I wanted the top of the bib to be, down to my pant top. Using that measurement, I would have over half of the fabric not needed. I hit upon the idea to fold that excess up and make a buttonhole at the fold. The business end of the suspenders would come through the buttonhole so there was less of a gap between the top of my pants and the bib. So, I folded up the fabric and marked where the buttonhole would go.
On the top side, I marked where the buttonhole was to go and how wide I wanted it.
Then, I took a deep breath and made buttonholes. I have never been very good at doing this. If I sewed more, I'd probably get reasonably good at it but making them bothers me. They turned out okay and aren't seen in the final bib.
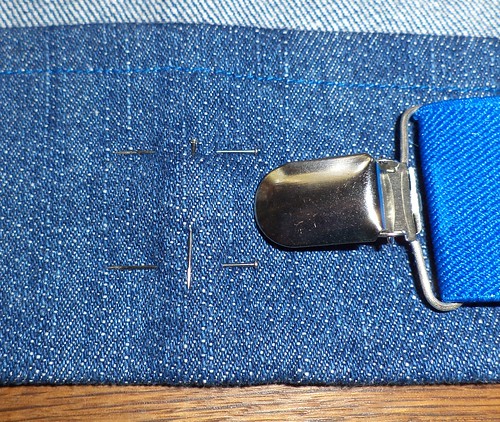
Once the buttonhole was opened up, I threaded the suspender through just to make sure it was wide enough.
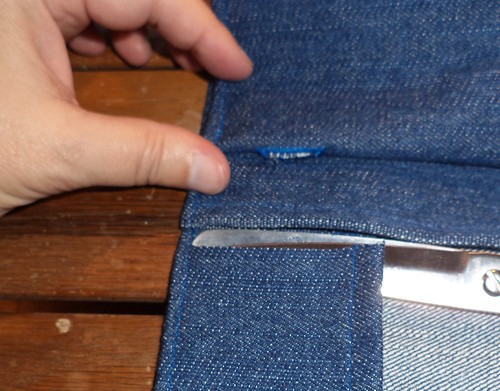
You can see how the fabric is folded up. It occurred to me, at this point, that the suspenders were lying on the top of the fabric and I had just made a buttonhole through all the fabric. Um...I can't sew the suspenders to the bib. My heart sank. What to do?
Then I had an aha moment. I would snip through the top part of the casing. Then, when the suspenders are threaded through the top casing, I can pull them out and push them into the right part of the bottom of the bib to come out through the buttonhole.
Once this snipping point was figured out, I ironed the fabric again to set the fold and sewed the outside seam first.
You can see, I'm close to the eye of the presser foot and the edge of the fabric. This seam is sewed top to bottom. When the outside seam was completed, I snipped above the top of the folded fabric to the line of outside stitching. You need enough of a hole to allow you to move the suspenders into the right part of the folded up fabric so the clasp comes out the buttonhole.
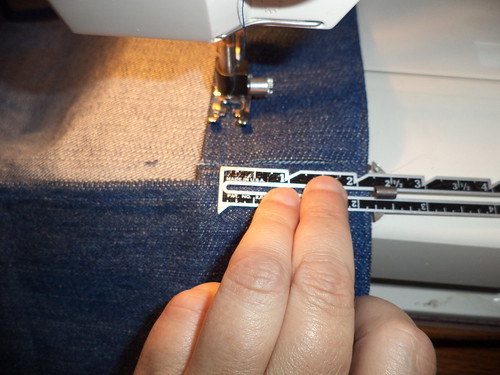
Then, I measured from the sewn seam back toward the middle. This is to make the seam line for the interior edge of the casing.
Happily, it was almost the same as the seam line for the original hem. I stitched that seam top to bottom. When that was done, I did a mental drumroll and started threading one side into the casing.
So far so good.
And, it worked.
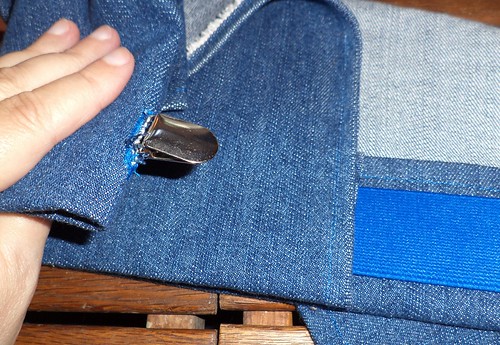
I did have to pull the suspender out of the bottom casing and put it in again. Because of the folded fabric, for some reason, not all the layers let me push the end through the buttonhole. Threading the suspenders through the folded part of the casing, because there is more fabric there, was a bit difficult and I had to work in 1/2 inch increments. Fortunately, there wasn't much fabric to go before the clasp popped out of the buttonhole.
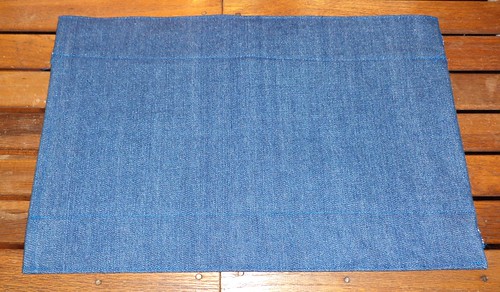
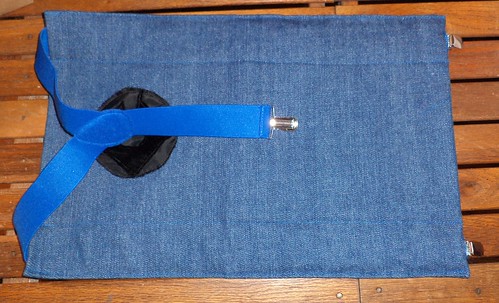
Here's the back side of the bib, now completed.
Here is the front side.
As you can see from the top photo, the bib is a bit long. Because I'm going to save this, I think I will lop off the bottom 3 inches, cover the exposed ends with bias tape and put the buttonholes in the tape. I'll still have the same effect but at the right length for the bib.
We're not done yet. The next post deals with the decal.
Beverage: Dr Pepper
Deb
"G" is For Grue - Halloween Costume 2013
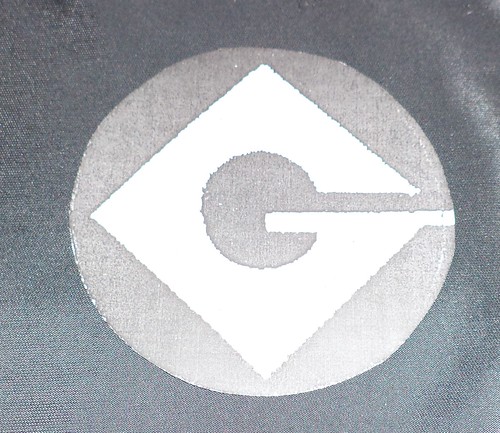
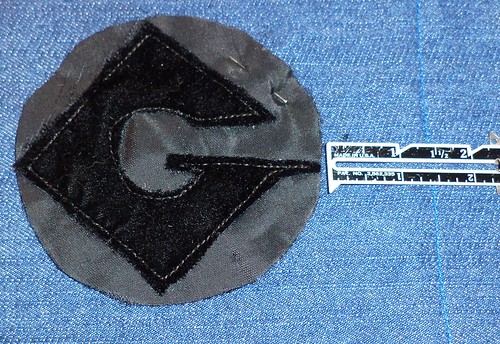
Okay, we have ourselves a bib but what makes the costume is the "G" icon that's on the front of every minion's overalls. Here's what I did for that.
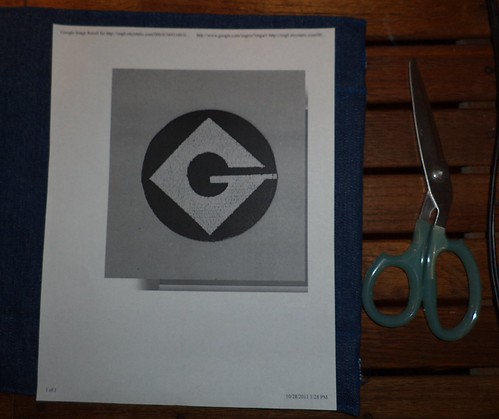
Step 1 was go to the Internet and find a large photo of the icon. I printed it out on an 8.5 x 11 inch sheet of paper.
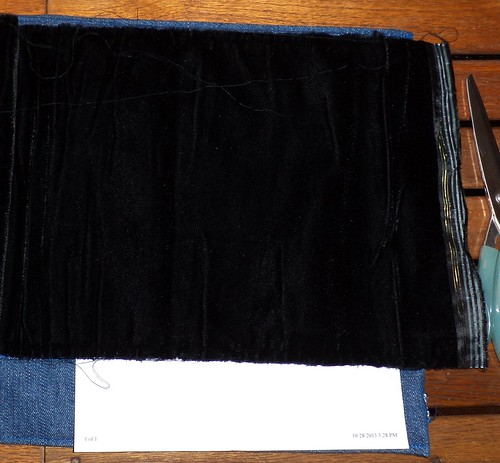
Step 2 was to decide how I wanted the emblem to look. I didn't want to mess with too many different pieces of fabric here so, when I bought the denim, I also bought a remnant of black velvet. This would give a somewhat three-dimensional quality to the finished emblem.
I hit upon the idea of using both sides of the fabric so I ironed the piece on the wrong side. Having been rolled up for a good while, it was really wrinkled.
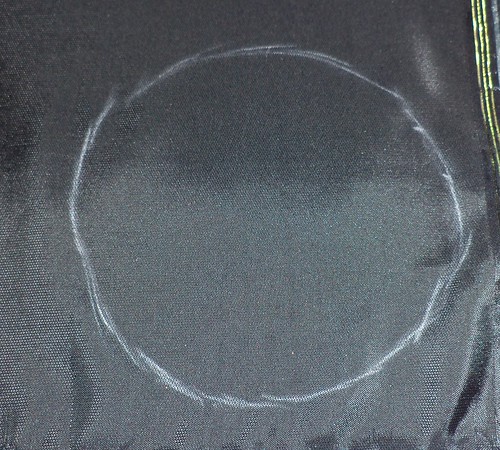
Step 3 is to cut out the emblem. It's a stylized "G" in a circle, so the circle was cut out first.
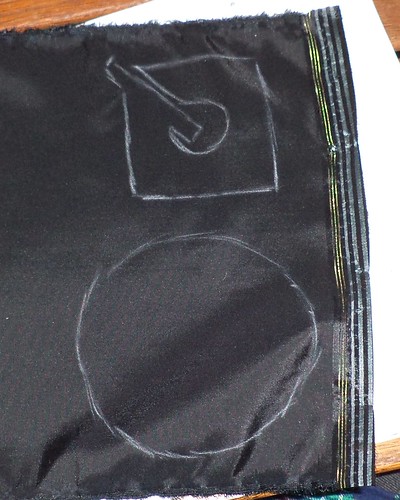
This is traced onto the back side of the velvet. My tracing chalk pencils have seen better days, but the white one was adequate to trace around the circle.
Step 5. When this was done, I cut out the "G". I'm going to make this from the front side of the velvet so it has to be traced upside down on the back side of the velvet.
When this was done, both pieces were cut out of the velvet and both the extra velvet and extra denim were added to the fabric boxes. Some day, I'll figure out what to do with them.
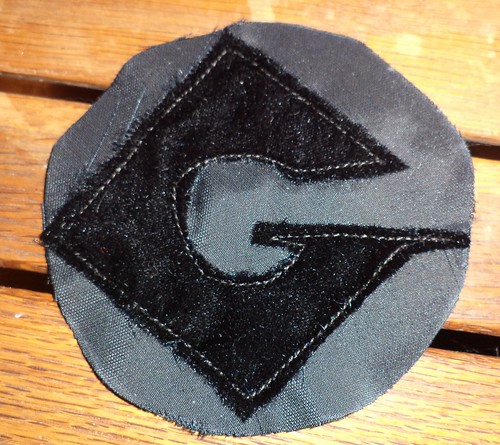
Step 7 is to sew the "G" onto the back side of the circle. I had problems with the black thread not coming off the spool properly so I grabbed the next darkest shade I could find. That wound up being a dark brown. It looks black when attached to the bib.
Once the "G" was attached, I measured, very carefully, to make sure that the circle was centered on the top of the bib. This part was very crucial for me. It's hugely noticable in the center top of the bib. If I was off on my placement by even an eighth of an inch, something didn't look 'right'.
Once I was satisfied with the placement, I pinned the circle, started at the top point, and stitched it to the bib. Because of the thickness of the velvet, there was a bit of puckering at the top of the "G", but it's turned under the point. Had I not used velvet, I wouldn't have gotten a pucker.
The last step, #10, was to thread the suspenders through both sides.
The bib is done. But you're still not a minion yet. You need the goggles. Can't be a minion without goggles. In the next post, I'll show you how I made goggles.
Beverage: Dr Pepper
Deb
You'll Be Needing a Hat - Halloween Costume 2013
To carry off this costume, you'll be needing a hat. Here's where I have a slight advantage. I root for the Iowa Hawkeyes, which means I probably have a hat that is the appropriate color of yellow. Second, I'm a pack rat. So, I set about looking through the winter hat bin. It's the same place where I have all my gloves, ear muffs, hats and scarves and yes indeed, I did have an appropriate yellow beret. But, I wear this hat and I don't want to have goggly eyes on the hat all through the year. How do I make goggles that won't damage the beret. I turned to the Internet for goggle ideas.
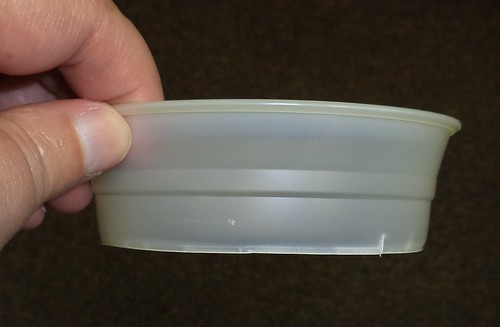
The minion costume idea I found made goggles from styrofoam cups. As I didn't have any on hand and forgot to grab a couple from the event I attended the evening of the 17th, I figured I'd have to buy a package of them. Said package, even the smallest amount sold, would sit, under the sink or in the basement for years, yes, years, before being completely used. I checked under the sink just in case I had a couple I'd forgotten about but no, no styrofoam cups. I found a stack of a dozen of these, however.
They will work just fine.
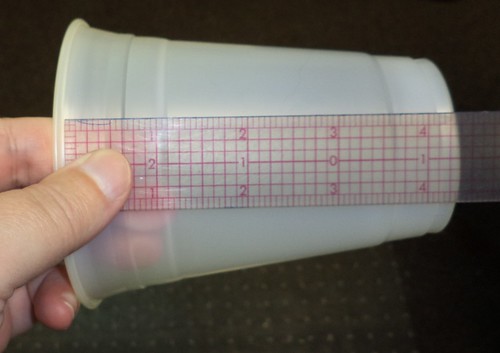
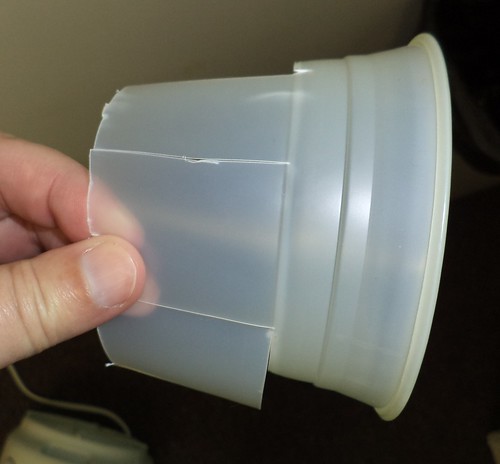
I measured the length from the lip to the edge of the ring. Then, I put a slice into the middle of the cup and used a scissors to remove all but the top inch of the cup. I found you'll need to make slices in the side so it's easier to remove the cup body.
Once you've cut away all the cup except the top inch or so, you're left with a nifty ring that is just the right size.
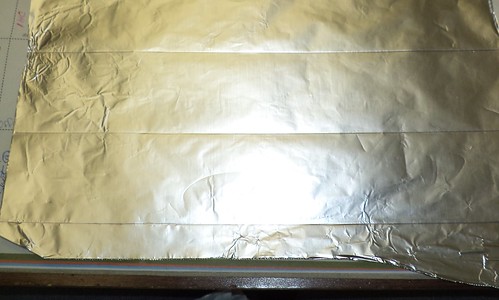
The goggle instructions said to use a silver marker and color the styrofoam. Well, these kinds of cups don't take marker very well so I hit on the idea of covering the edge with aluminum foil. Using the measurement of the width of this ring, I took a piece of foil the length of the circumference of the cup.
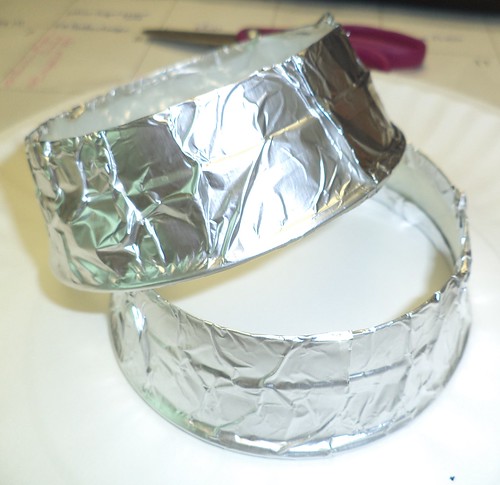
I measured the width of the ring and added another inch to that measurement and cut two pieces, one for each goggle. I wrapped that length of foil around the rings, keeping the ring in the center of the foil. As I worked, I folded down the top half inch of foil over the edge of the ring and then did the same with the bottom edge. When you're done, you'll have two rings that look like this.
Now you need eyes. I took two paper plates and traced around the largest part of the rings and cut that out. I didn't have a compass at work so I was going to measure the inside iris and pupil, but, in looking about my desk, I found an aspirin bottle and an eraser were the right sizes so I traced around each. Then I colored in the iris with marker.
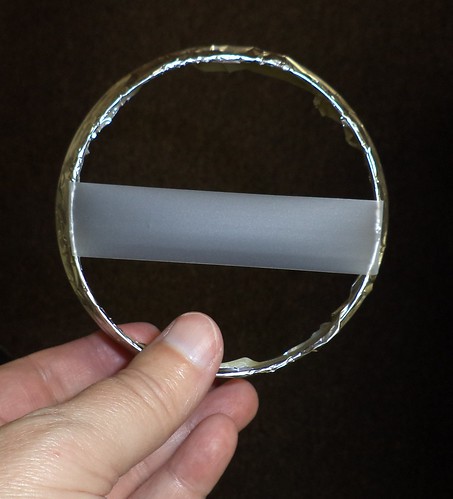
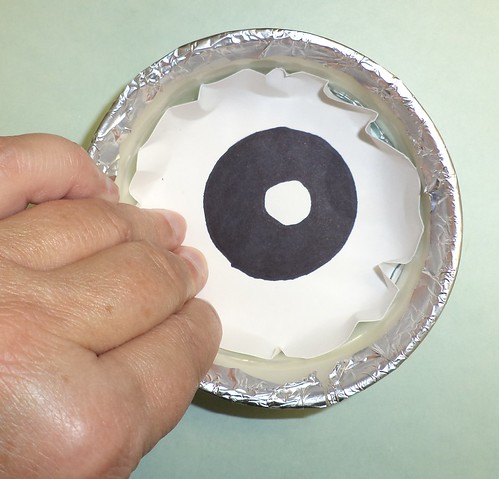
When this was done, I started to stick one eye into one of the goggles. You'll need to bend it around the edges just a bit to get it into the ring. It kept popping out until I had the thought to anchor the eye to a piece of tape strung across the back of the ring.
It still took a bit of force as a paper plate is rather stiff, but once a section of an eye was stuck to the tape, I added another piece across the first piece at a right angle. This was just enough tape to hold the eye in place.
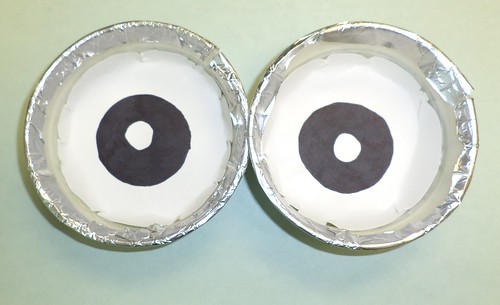
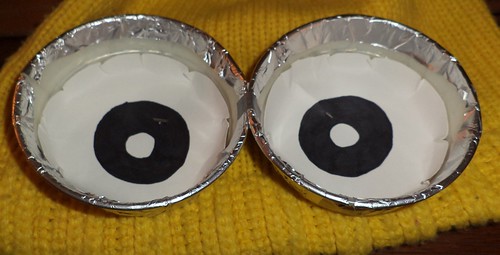
You want to push the eye down onto the tape and then work around the edges, folding them up against the ring. When you're done, you'll have a couple of eyes that look like this.
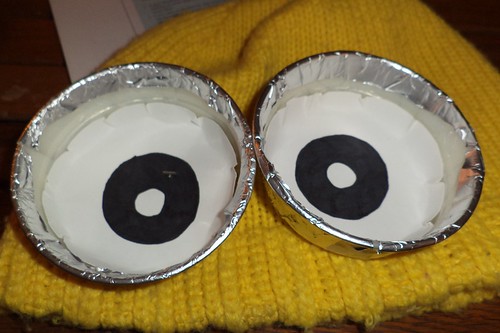
Now, position the eyes on your hat.
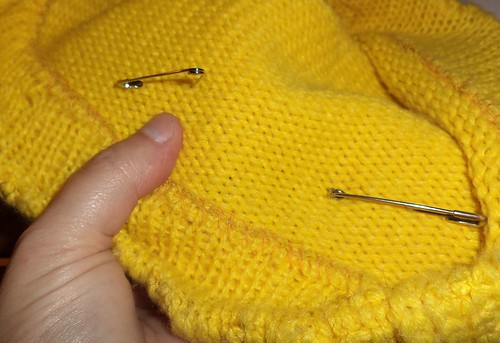
On a beret like this, I could place the eyes pretty much any place I chose since the hat is almost a circle. Take a couple of safety pins, I used the largest I could find, and safety pin the goggles to the hat.
I made sure the pins went through the iris. They are almost invisible on the front.
One of the problems with the eyes is that on a hat like this, they won't stick together. In trying the hat on, I had one eye pointed one way and the other looking a different way, owing to the stretching of the knit.
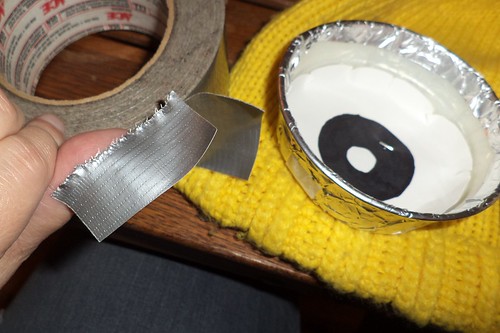
I solved that problem with the omnipresent duct tape.
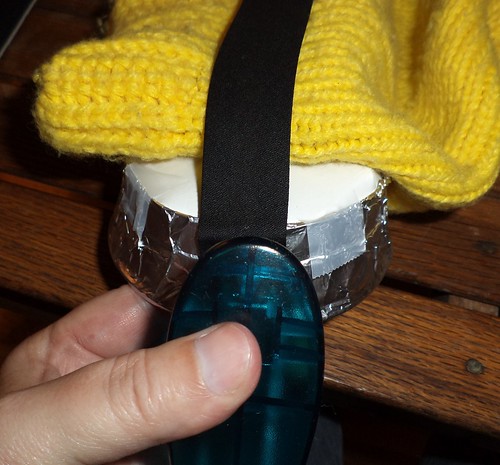
I cut a strip about a half inch long. That was folded in half and affixed to the exterior of the eyes, right were the bridge of the nose would be.
Another small piece was affixed to the front of the goggles right at the bridge of the nose, kind of like the running joke about fixing one's glasses with duct tape.
The small strip is almost invisible against the aluminum foil.
Now to make the goggle "strap". Here's where being a pack rat is extremely helpful. Given that I waited until the sort of last minute to finish this, and the car was in the shop last night, and it was pouring rain, and it was late, what could I use for a strap? I thought about the extra black velvet but that would require seaming and I didn't want to dig out the sewing maching because I'd put it away after making the bib the night before. As I was eating supper, it hit me. Viola.
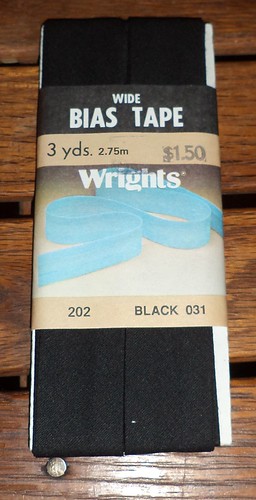
I had an unopened package of wide bias tape in black. Even though Iowa's colors are black and yellow, I do not want to sew this tape onto the knit hat. The stretchy quality of the hat will tear any stitching I could do, even hand stitching. So, I utilized safety pins.
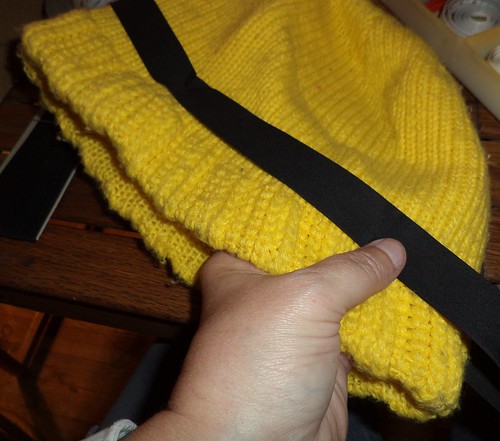
I put on the hat and wrapped the tape from goggle to goggle, adding an inch on either side. With that hunk of trim, I put one edge up against the goggle and wrapped the rest around the hat. The trim is safety pinned from the back adjacent to the eye and in the back middle. This allows the hat to stretch over my head without breaking any stitching or ruining the hat.
The ends of the trim are folded up onto the side of the each goggle and stapled to the side to they look like they are adjustable. (Finding the stapler was an adventure in and of itself. I'm thinking I don't need all the stuff in that bin.)
The end result is something close to a minion's head.
Plus, all the pieces come off the hat and can be saved for next year. The bias tape can be cut off the goggles and that piece used for something else. These instructions can be used whether you are making the goggles or the monacle.
I hope you've enjoyed these instructions. The look on faces of the staff, my doctor and the two kids in the elevator were priceless and it was an inexpensive costume to make. If there is something else you'd like to know to make the costume for yourself, just ask.
Beverage: Dr Pepper
Deb
Labels:
costume,
craft,
Dr. Francis,
Halloween,
humor,
Iowa Hawkeyes,
movie,
recycle
Subscribe to:
Posts (Atom)

