Labor Day. Last day of vacation. Time to make a memory.
Throw open the back door with the loppers in hand and, blarg. That's heat and humidity, already, at 9:30 a.m. Close door. Pour a glass of oj, sit in the recliner and start thinking the whole day is ruined because it happens to be 80 with 80% humidity at 9:30 in the morning.
To paraphrase Lady Macbeth, "Out! Out! Damned thoughts!"
Shower now because you were going to do it after you worked up a substantial sweat in the yard. Then, sort, toss, dust, sweep. Read those newspaper items mom sent back with you and put them in an envelope to send to your sister. Finish writing that letter to a friend and, by the time you're really sure you have nothing left to say, realize you've written 5 pages, front and back. A) She will be flabbergasted and B) This will give her something to read with morning coffee on the patio or in an airplane as she jets off to somewhere. (I have cool friends, in fact, all my friends are way cooler than me.)
Now what do I do?
A little voice whispers, "Finish me?" Oh yeah.
Two of the blogs I read,
Michele Made Me and
Sew Many Ways... recently featured craft space make-overs. Wow. They have a spot just for their crafting supplies! Wait. Wait. If I start comparing, I'll get down and the banner won't be made. I have ample space to do what I want to do so let's get started finishing the banner.
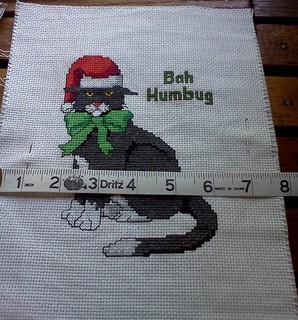
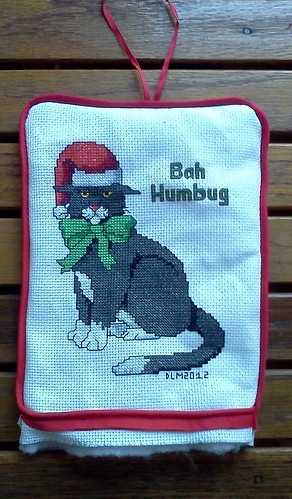
Instead of getting the finished cross-stitch framed, I'm going to turn it into a banner, of sorts, something that can be hung most anywhere. In order to do that, it's going to need some weight so it hangs properly. Because the finished piece of cross-stitch is 8 x 10 inches, I'm going to put a layer of quilt batting between the cross-stitch and the fabric backing. Quilt batting will give it just enough weight that it hangs evenly even if it's near the heater and a breeze. Plus, it will be lightweight to mail, as I won't see the recipient to hand it to them. AND, the whole thing is washable in the unlikely event Great Uncle Joe is doing his flamingo dance in the living room with the egg nog.

When I decided that was what I wanted to do, I felt a trip to the fabric store was going to be in order. I didn't think I had quilt batting. I probably had the right fabric for backing but quilt batting? I couldn't remember when I'd done any sort of quilting short of the quilt I made for my sister when she married and I remembered using that up. But the sewing gods were smiling on me as I reorganized the fabric boxes. Viola. There's the perfect fabric for the back, in more than ample quantity AND a bunch of quilt batting.

So, step one for this craft was not removing the cat from the table. Both of them were sound asleep throughout the process. Step one became measuring, measuring and measuring again. You need to know the absolute width and height of the project. Once you have marked your margins, and measure yet again to make sure you like it, pin the cross-stitch to the batting and cut out around the current edges. Yes, the current edges. You can always trim excess. You cannot add width back without major sewing.
Now, pin around the design. Keep your margin marking pins in place, but pin through the design and the batting. You don't want that batting going anywhere so anchor it down.
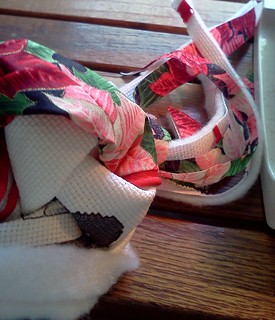
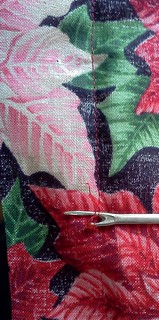
Next, I'm going to add trim around the edges. You can skip this step, if you like but I think you'll like how the finish project looks with trim. This edging has a cord encased in cotton trim with a "lip" which is sewn in place. There is a line of stitching on the trim. Put that line, as best you can, on the margins of your piece and pin it down. When you're done, it will look like this. I always have a bit of difficulty turning the corners.
Now you're ready to sew the trim down. Follow the stitching on the trim and, as long as you've pinned it where you want your margins to be, you won't go wrong.
Once you've done that, realize that you forgot to put your initials and the year on the piece. This does, however, give you an opportunity to put away all the excess floss and organize the ottoman to a degree. You have to "sign" the work now because there isn't a time after this that stitching isn't going to show.
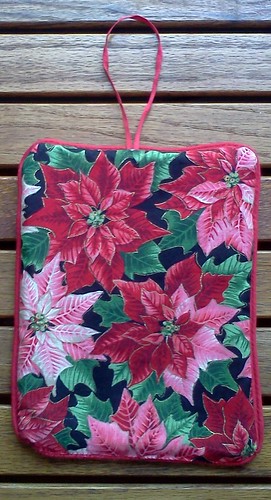
The next step is to cut the fabric. I have a lot of this poinsettia fabric. I think I was going to make Carole something from it, maybe a dress? Maybe it was for me? There's nearly 3 yards of it here. It's probably good for yet another camp shirt although I might have to get another color for the sleeves. I don't remember exactly how much fabric the camp shirts take. An 8 x 10 inch piece isn't going to cause problems down the road.
Once you've cut your fabric, put the right sides together. You'll be stitching three sides and turning this right side out. Pin the whole thing in those margins outside the trim. Pin all the way around although I'm not sewing the bottom because that's where I want to turn it.
If you are going to use something to hang this from, now it the time to cut your ribbon, cording, piping, seam binding, whatever, and pin it square in the middle of the top with the loop falling into the center. You're going to stitch over the ends of the hanger.
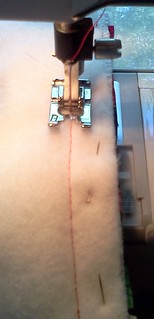
Once you have the whole thing pinned, flip it over. If you used a color other than white or say, light yellow or light gray, you'll see your original trim sewing line. Follow it. Follow it like mice following the Pied Piper. If you follow it exactly, when you turn the project inside out, there will be no stray stitches to remove. I knew this, of course, as I have sewed for decades. But, when you're zipping along sewing something, it's easy to forget some of these kinds of details. I figured this out and etched it in my brain last year when I made all those ornaments. Sometimes, those stray stitches are hidden. Most of the time they are not and then, you have a devil of a time pulling them out so the piece looks good.
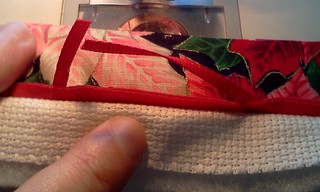
A lot of sewing or crafting blogs show you the lovely part, the finished part. I sometimes wonder how many "Ooops" did it take to get to this finished item. I'm going to show you my oops and show you how to fix it.
To the left there is the top of the banner. On the left is one end of the ribbon hanger and to the far right is the other end. I thought, when I pinned, that I caught both of the hanger ends. I did not. The movement of the presser foot over the fabric shoved the right end almost to the corner. Obviously, this is not what I want.
So, I took the seam ripper, and you're not a heavy-duty sewer if you don't have 3 of these in your sewing box because who knows where you left the last one, and flip your project onto the fabric side, not the batting side. You don't want to rip out the seam on the batting side. Trying to remove stitches while working from the batting side will cause you to rip the batting. I've never been able to remove stitches and keep the batting intact along the seam line. There's no need to fret about trying to get just the thread when flipping the project over and working from the fabric side makes your repair job easy.
Locate the edge of the hanger that is out of place and start ripping out the seam from there. No sense in going all the way to the corner. You only want where the oops was. Remove the stitches from the point of the oops to right next to the properly positioned hanger edge. If they are both out of position, rip out the stitches to just beyond the middle. As I said, there's no sense in ripping out the top seam. You just need to put the hanger back in the right place. Pin that sucker down, flip it over and restitch the seam, just the part and a little on both sides, that you ripped out. Remember, follow our original seam and you'll be in the right place.
Now comes the fun part. Diagonally trim the two top corners and trim the sides to about 1/4 inch. You can grade the seams, if you like. "Grading", for those who aren't long time sewers, means cut the fabric, batting and Aida cloth at different widths. I find grading to be a chore and rarely do it unless I feel it's going to be too hard to turn a project otherwise. It's done to reduce the amount of fabric in a seam that's going inside out but it also provides strength and stability. Don't trim the bottom just yet. We'll get to that.
When it's right sides out, it looks like this.
Here's the time you'll trim the bottom. Cut off the excess Aida cloth and batting to the edge of the trim. Don't cut the fabric. When this is done, turn the trim edge, Aida cloth and batting to the inside. Fold over the backing cloth and cover the edge of the trim. Pin this. You see I folded my backing cloth so its edge is right against the edge of the trim. This hides the trim's sewn edge. Now hand stitch the whole bottom edge together.
When you've finished hand stitching, you're done. Here's the back of the project.
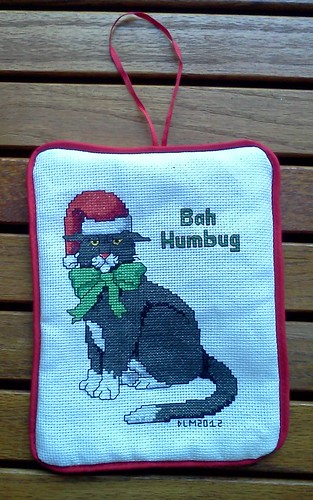
And here is the front.
It strikes me that this might be the size of a Kindle or a Nook. If you didn't have a carrying case or wanted something unique, you could use this method but leaving one edge open, to make a personalize carry case.
So, this project is done. While I am drawn to making another red corduroy coat, I'd need to go to the fabric store, look through patterns, be depressed that I can't find what I think I want, settle for something else, buy lining fabric and then cut out and sew the coat. I don't have the excess funds, right now, for a trip to the fabric store. I have another cross-stitch project I can work on, something of my own design. Maybe I'll start that.
Beverage: Dr Pepper
Deb


No comments:
Post a Comment