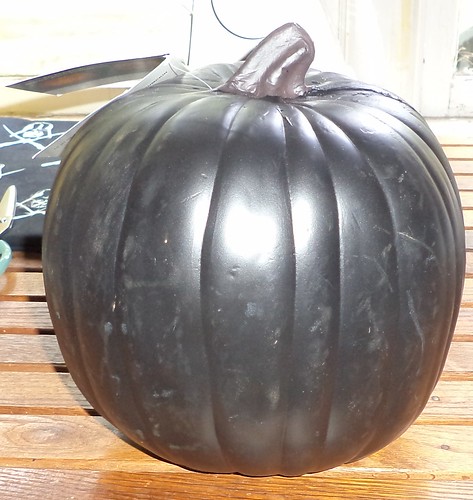
 Oh man. It just screams Halloween decoration project. I had to wait until payday and then, JoAnn Fabrics was nice enough to put them on sale, 50% off. One of the small ones made it home with me. You probably can guess what I turned this into so let's get started.
First off, I asked the model to hold still long enough so I could ascertain where all the features go. She didn't want to pose.

Neither did Mija.
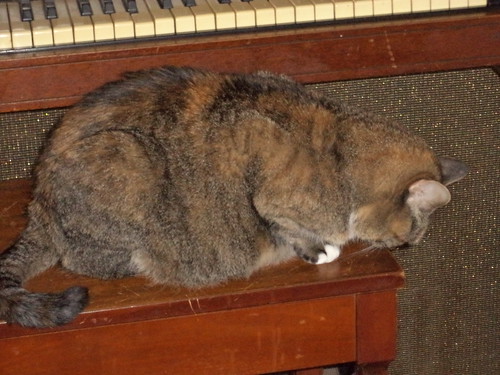
They know the sound of the camera and with that sound comes a flash which they don't like. So, I had to do some ear scratching to get an idea of where to put the face on the pumpkin.
Here's what I used for this project:
Phillips screwdriver
Exacto Knife or other flat knife for shaving
All-purpose (Elmer's) Glue
Thin Styrofoam
Glitter
Chenille sticks in black (I call 'em pipe cleaners, but whatever)
Toothpicks
Empty envelope
Newspaper
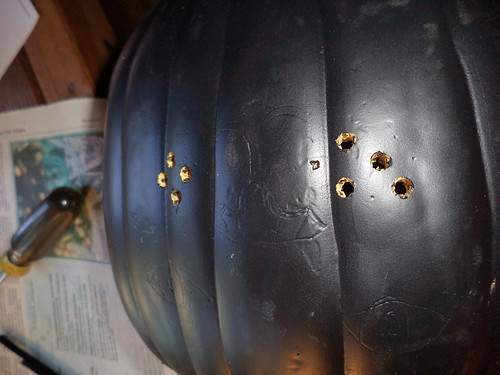
Step 1 is to decide, on the pumpkin, where you want the face to be.
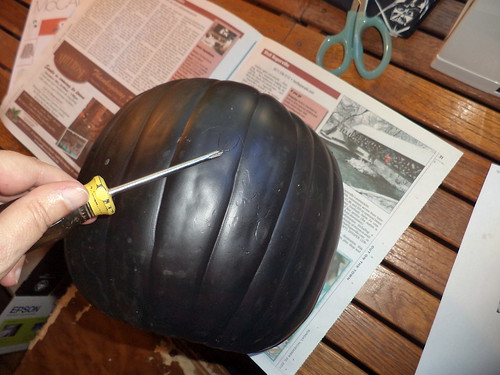
Once I decided which side was the face, I used the screwdriver to "draw" the eyes, nose and mouth on the pumpkin. This is important for whisker placement. The black pumpkin is very forgiving in drawing so long as you don't push very hard. These are advertised as "carveable" but they are quite sturdy and would take some work to carve.
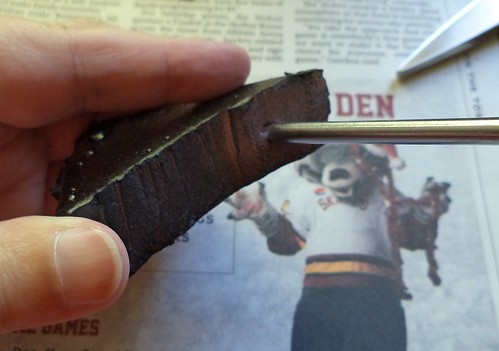
When the eyes, nose and mouth were to my satisfaction, I poked holes for the whiskers on either side of the nose.
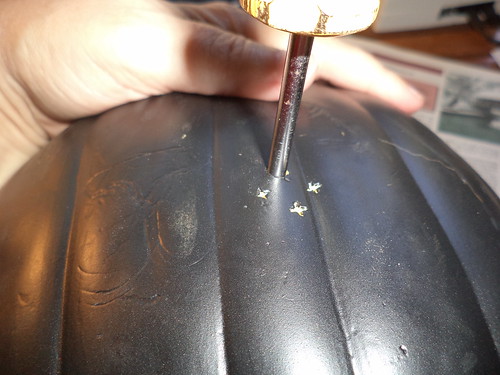
You have to push fairly hard, to get the screwdriver through the pumpkin and you need to push all the way through. I couldn't find my awl, but I don't think it would have made the right size holes.
One side was a triangle, the other wasn't. There are quite a few whiskers on a cat's cheeks. I opted to go with 4.
If you are a regular reader, you remember the styrofoam spiders I made a couple years ago. I had pipe cleaners left over from that project.

I kept the long ones same size. I can always trim them after assembly. The shorter ones would be the whiskers over the eyes, by the ears.
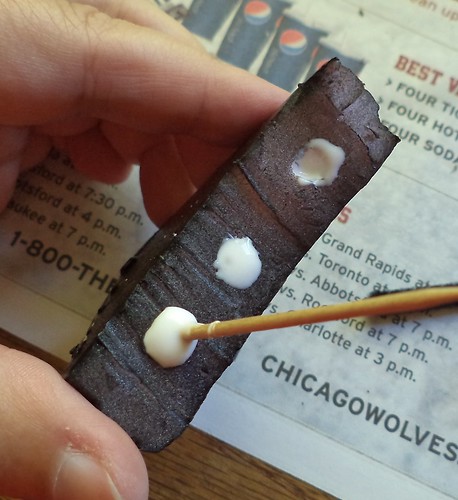
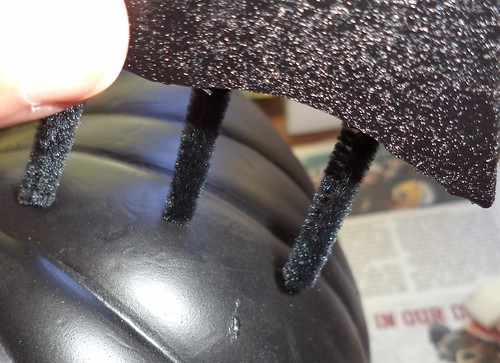
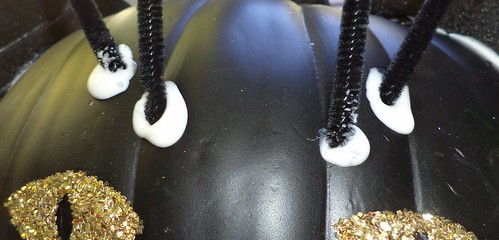
When the holes were finished, I slathered one end of a pipe cleaner, dribbled glue in a hole and stuck in the stick.
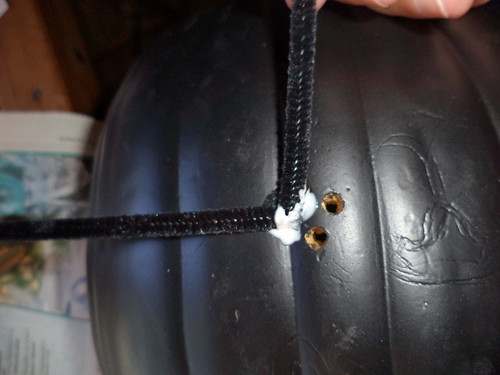
You can not have too much glue here. Repeat with the rest of your sticks.

I've really got these glued up. The glue dries clear so it won't be seen in the finished product. The key is to make sure the sticks can't be pulled out or otherwise come out of the holes.
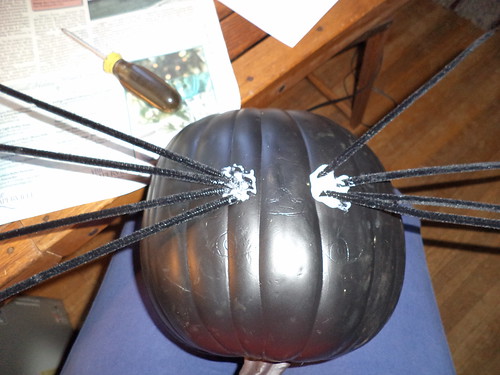
Let this dry, completely, overnight. The next day, we start with the glitter.
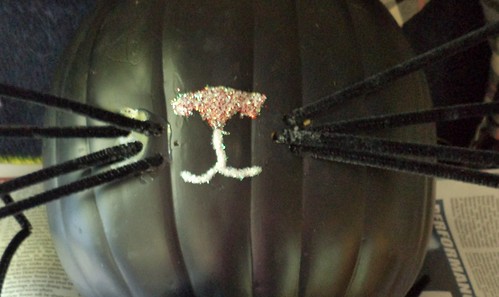
I filled the outlined nose area with a mixture of glitter colors.
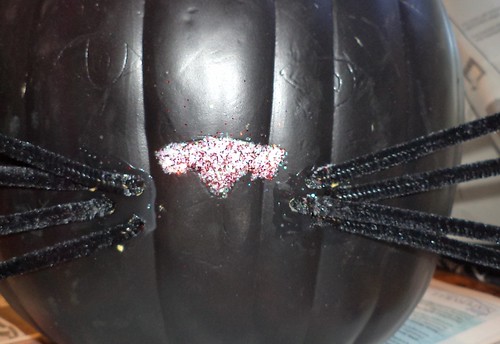
Technically, a black cat's nose is glossy black. But I wasn't about to go buy more glitter when I've got a bag of colors already, some of which are pushing 25 years old. I decided, for effect, a pink nose was needed, but I don't have pink glitter. Again, I'm not rushing out to buy another color. Relying on my knowledge of color combining, I used red and white.

I dumped a bunch into an empty envelope and shook.

The result is okay. It works. I slathered glue over the area where the nose is and drizzled the color mix over the glue. For good measure, I patted the glitter down into the glue and let the pumpkin dry over night.
The next day, it was time to do the mouth. The same process was used only I didn't need to dump the glitter into an envelope. I could shake it right from the bottle. Make sure your work space is covered with newspaper or you'll have glitter all over.
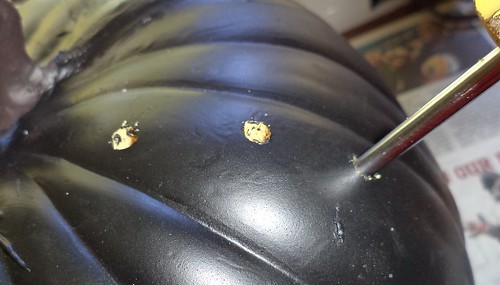
This glitter was tamped gently into the glue and left to dry overnight. The reason I'm letting this dry is so there isn't overlap of glitter colors. The next day, I did the eyes in the same fashion using gold glitter.
I use toothpicks covered with glue to outline the space and fill it in. You can see how the glue dries clear for the whiskers. They aren't going anywhere. I decided to put the whiskers in first, before the face, so I had a reference for the nose and the eyes. Plus, I didn't want to mess up the glitter. I'm not sure which is easier, to put in the whiskers first and be careful you don't bend them, or do the face first and be careful you don't smear your glitter or rub it off.
With the eyes done and rested overnight, it's time to plan where the whiskers above the eyes go and to make the ears. Step 1 is to cut two triangles from styrofoam. I happened to have a piece of half-inch styrofoam which had been used as a packing material.
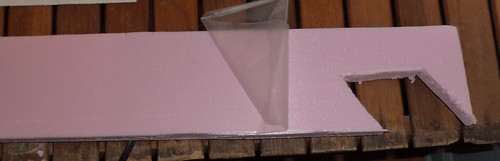
I cut 2 matching triangles from the piece.
This styrofoam is great because it will handle weather well. I intend to put this and the spiders on the front steps at the end of the month so they aren't exposed, all month, to weather. We've had rain since mid afternoon on Monday, sometimes very heavy. While I'm mostly confident the pumpkin would withstand rain and I know the spiders will, I think I'll keep them inside until the days right before Halloween, just to be sure.
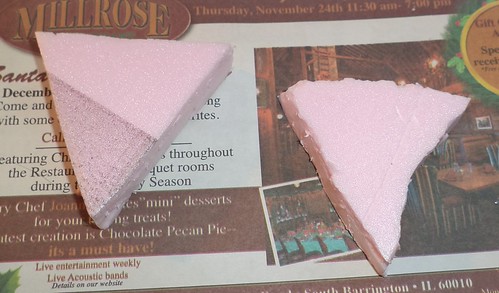
So, I took the triangles and figured out where, on the head, I wanted them to go. You're going to have to shave the bottom of one of the triangles so it fits the curve of the pumpkin.

It's kind of like peeling an apple except the flakes you carve away tend to stick to your hands and the knife. I carved and then placed the ear on the pumpkin to see where I needed to peel more away.

When the ears were to my satisfaction, I spray painted them black. Thank goodness for having left over black spray paint from making the spiders.

These definitely have to dry overnight. Enough spray paint had gone under the ear to the "back" that, when I flipped them over, there wasn't much to spray. The force of the spray will push these all over your paper, too. Just be aware of that. I didn't get to the ears for a couple of days so they were thoroughly dry by the time I had to work with them.
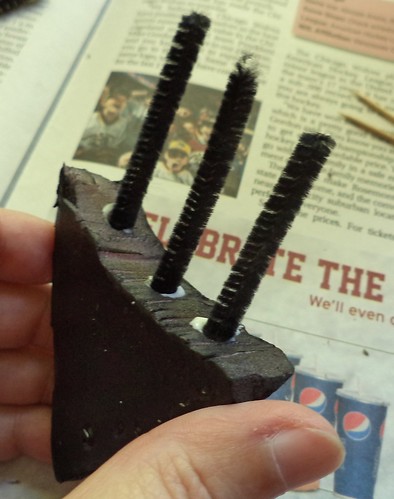
I wasn't sure how I was going to hold the ears on. If the pumpkin was softer, I could just shove a toothpick, slathered with glue, through the ear and into the pumpkin. But there was no way with this pumpkin that was going to work. Then I had a lightbulb moment. The pipe cleaners. I used the screwdriver and poked three holes in the bottom of each ear. You'll need to watch on the edges so you don't poke through, but you need a hole about an inch deep.
That was filled with glue.
Then I took some of the short pipe cleaners and cut them in half.
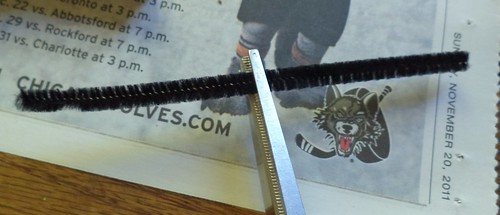
This provided an anchor for the ears that was just long enough to go into the hole in the ears. Each ear will look like this when you're finished.
While letting the glue set on these, I could use them to mark where the ears will go on the pumpkin. Hold the ear on the pumpkin and lightly press each end of the pipe cleaners onto the pumpkin, leaving a mark.
Take the screwdriver and poke holes at these marks. The pipecleaners are flexible enough that if you don't quite get the holes to correspond to where the cleaners are, they will still go into your poked holes.
You'll also want to make the holes for the eye whiskers at this time.

By the time I was ready to attach the ears, the glue holding the sticks in the ears had dried enough to be really sticky. You can let it dry completely overnight or continue. You're going to use more glue here so I didn't think it mattered.
You need to put the ears on first, before the whiskers. The whiskers just get in the way if you do it the other way around. Slather glue on the area where the ears are going, making sure you dump some in the ear holes.

Don't be stingy. Cover the ends of the sticks coming out of the ears and stick the ears onto the pumpkin.
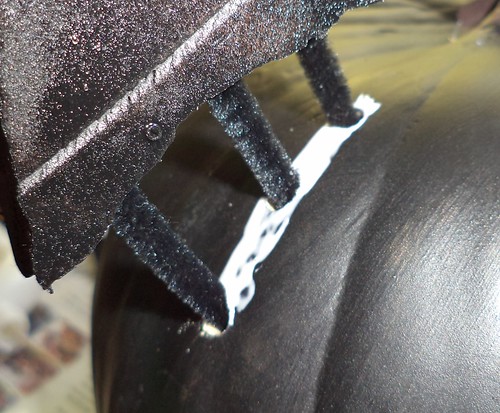
If you've punched your holes right, they will slide in easily.
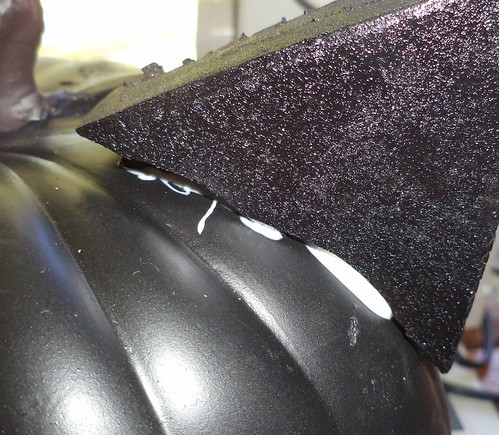
I slathered the glue onto the area where the ears sit and stuffed some under the ear before sticking it onto the pumpkin. The whole idea is that it shouldn't come off. Remember, the glue dries clear.
When this was done, I used half sticks and stuck them into the holes above the eyes, putting glue in the holes and on the end of the sticks.
The pumpkin was laid flat-ish, as flat as I could get, so the glue didn't slide down the front of the face, and it was left to dry overnight. I decided, after looking at it the next day, that the full length of the sticks was too long for the face so I cut them a bit over half-way.
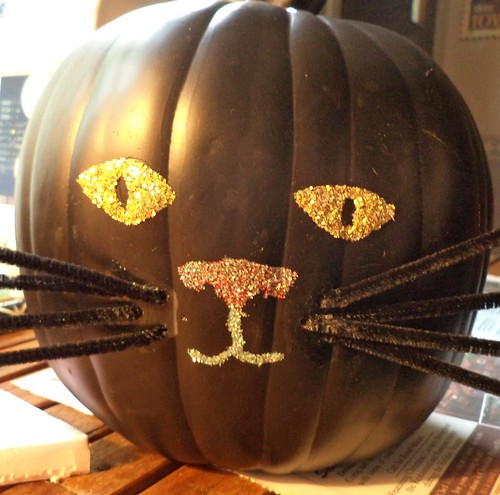
Here's the finished pumpkin.

Mija gave it a sniff.
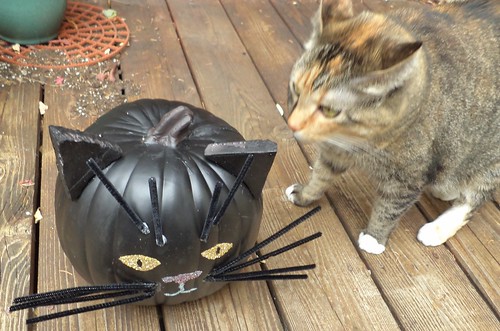
The model was less than impressed. At least she posed.

You can see this is not a one day project. You possibly could combine some steps, but I recommend letting things like the glitter and the whiskers dry completely before moving on to the next step. Pushing the glitter into copious amounts of glue and letting it dry means the glitter won't sluff off as you move it around the house or as someone sniffs the final product. Assuming you have to buy everything, the final cost, provided you get the pumpkin on sale, should be around $20.
I hope you enjoyed this project.
Beverage: Water
Deb
Awesome!
ReplyDeleteYou are way more imaginative than I am.
Great idea!!
Nancy