First, you need a garden gnome.

I was in luck. Garden gnomes after Labor Day were 40% off at an Ace Hardware I happened to be by. It was kind of difficult to decide which one of three poses I wanted. I decided the one with the rake had the best opportunities for zombieness. You'll probably find garden gnomes on sale at garden stores or online. You can use my directions as suggestions for zombiefying your gnome.
This is for Halloween so I need bats and spiders and skeletons. I searched the Halloween aisles at JoAnn Fabric and Crafts and struck out. Then, I had to get buttons for another project and there they were. Halloween buttons. Of course.

Now, we're going to use fishing line to attach our buttons to our gnome. I've had this fishing line for some 20 years specifically for craft projects. I got out my needle threader because it can be tough to thread thread through the eye of a needle and thicker fishing line wasn't going to be easy. You'll need a darning needle because regular hand sewing needles do not have a big enough eye to shove fishing line through.

Once I got the line threaded, I positioned one skull on the rake and threaded the needle through the button and around some tines of the rake. I tied several knots once the skull was in position. This was repeated for each of the skulls in the package.
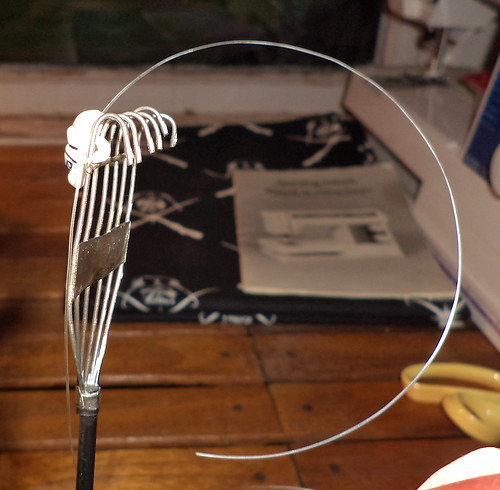
I left extra long lines so I could tie another knot if I felt the skull wasn't on the rake securely enough.
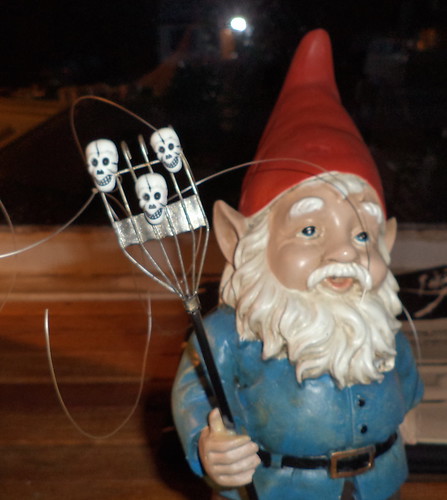
The rake provided a great place to stagger the skulls. There was a gnome with a spade and, I think, one with a bucket.
When the skulls were in place, I leaned the gnome over and put white glue on the knots on the back of the rake.
I really saturated the knots to make sure they were securely anchored to the rake. This was left for 24 hours to dry thoroughly. Once 24 hours had passed, I trimmed the ends to be close to the knots.
The next step was to begin the zombification. This was going to involve adding paint to the gnome. First color added was red. After all, zombies desire braaaaaa-aaainnns.
I used acrylic paint. Aside from the gnome himself, this was my biggest expense. Carole and I used to have acrylic paints in the basement. They last for a long time, but there wasn't any red. I had to go to the art supply store and get the smallest tube I could find of blood red. I did have brushes, however. Art brushes are very expensive so I was thankful I didn't have to buy one.
I took a small brush and just started adding strips and spots of red to the gnome. I went with the places where he'd have residue from his search for brains. I started with the face and hands and then moved to the clothing.
When that was done, I took black acrylic, something we did have, and added black smudges.

What really made him look zombie-ish was painting the black circles around the eyes. It made the eyes seem sunken. Black smudges were added to the hat and the pants and to the back side, which most people aren't going to see but which I knew I wanted to do. I took a moistened paper towel and smudged some of the black and red spots. When I was satisfied with the distressed look, I let him sit overnight.
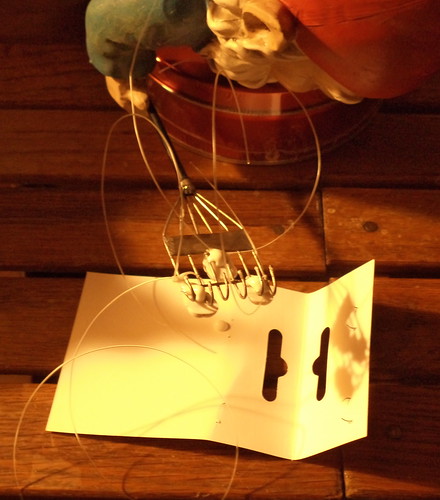
Included in the button package were some flat buttons.

The small spider and the tombstone had button backs. Everything else was flat. I would need to glue those somewhere on the gnome and then tie the spider and the tombstone to something. The day after painting, I began placement of the other items.
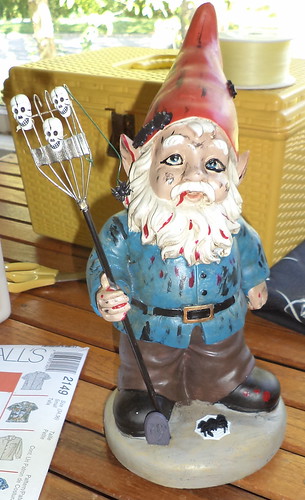
The bats were glued to the hat. The large spider was placed in the middle of the web and both pieces glued to the base.
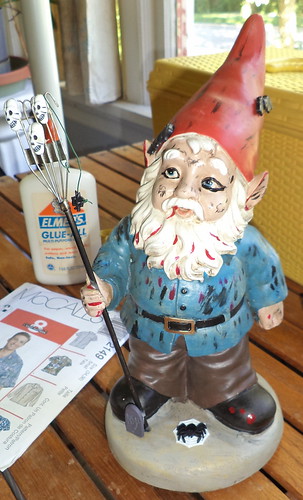
I tied the headstone to the base of the rake and glued it down. In the basement craft drawers, I found some wire. No clue why I have it. I cut a hunk, twisted it around the small spider and then anchored it to the rake. I could find no logical use for the hat item so that went in my give away bag. Seriously. I'm giving something away. I really can't think of why I would want to keep it. It doesn't have a button back so I can't use it on a sewn item. You know, it was hard to put it in the give away bag. I could hear this little voice saying, "Why give it away? You know you'll find a use for it." But I resisted the voice. I have so much "I'll find a use for". It's really time to be proactive about what I decide to save.
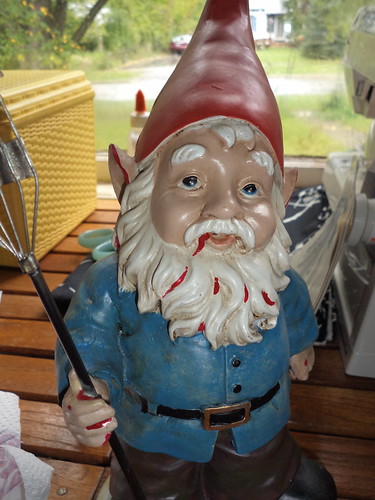
The completed gnome went with me to Virginia at the end of the month and was presented for their side deck.

He actually looks kind of happy there. You know he's waiting to steal your soul if getting your brains doesn't work.
Beverage: Water
Deb
No comments:
Post a Comment