
There were rather large holes under the downspout, where overgrown bushes were removed. I decided I wanted a raised bed here; something small-ish which would handle peppers and fit in this space. I searched all sorts of places which came up when Googling "raised beds". That can be something of a rabbit hole. Would you like the Cadillac of raised beds, lacking only a gardener to tend it for you, or would you like something which looks like two squirrels slapped it together with help from a chipmunk? And pieces; lots and lots of pieces. If you are the handy sort, you probably could design your bed and just buy pieces. Me? Not so much. I needed a kit. I just wanted something I could assemble and move into place, which would fit in the spot by the downspout. Those tiger lilies, with the trash gone, will just go everywhere.
I found a bed at Home Depot. The bed is by New Tech Wood. The current price is not what I paid for it back in mid-March. I settled on this bed and then watched sales and coupons. I think I spent $50 for it and I feel that's a very good price.
Shall we talk about how it comes?
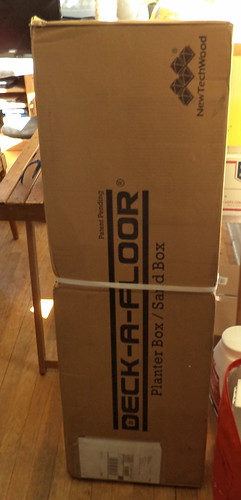
Is this a box or is this a box? I came home in late April to see this sitting on the front porch. It was a bit heavy to pull inside, but there's my raised bed. I put it together the weekend after it arrived.
I dragged it out onto the deck and opened the box.

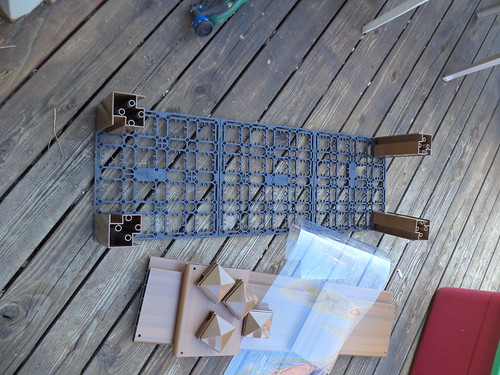
Everything is contained and nicely packed for shipping. Nothing was loose. I dumped it out.
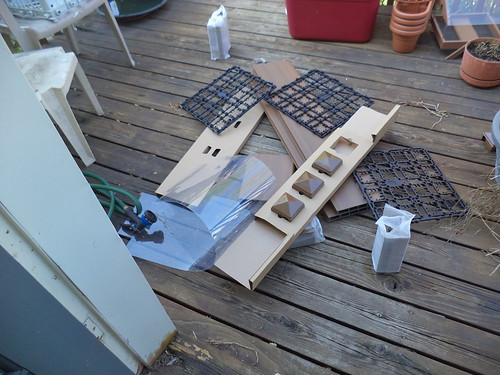
My heart sank. Man, this is a lot of stuff. How was I going to put it together. There also were not printed instructions. There was a parts list, but nothing else.
One of the benefits of technology is having video at your fingertips. A selling point of this bed was the video on the product description page. I watched that and felt I could assemble this without need of many tools and it would be light-weight enough I could put it together on the deck and move it to the spot in the yard where I wanted it. I have an iPad. I can watch that video, stop it, assemble and move on.
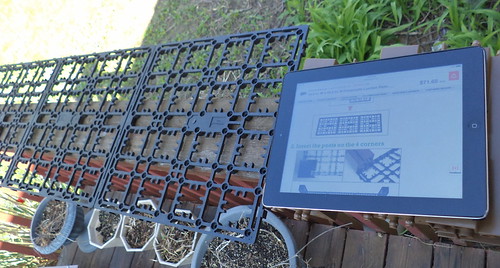
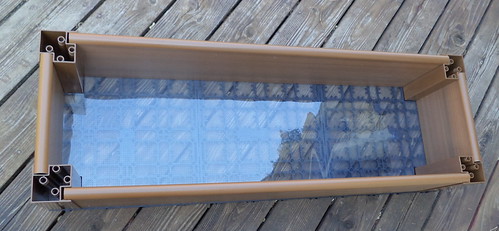
My deck railing is just a bit smaller than the iPad, but it was fantastic to be able to watch and find the parts and move on. That's the bottom of the bed. Here's a close up.
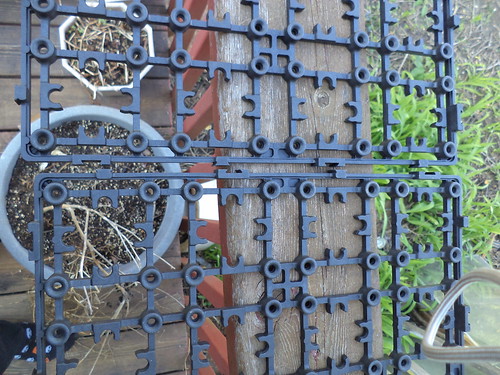
I guess you'd call this "modular". The bottom pieces snap together and everything snaps onto or into everything else.
When the bottom pieces are snapped together, you add the sides. You can see the sides have a distinctive shape to them. The walls will slide into the grooves on each side so you need to make sure you put the indentation the right way, not that I would have knowledge of putting them on wrong. (Oh look! A Squirrel.)
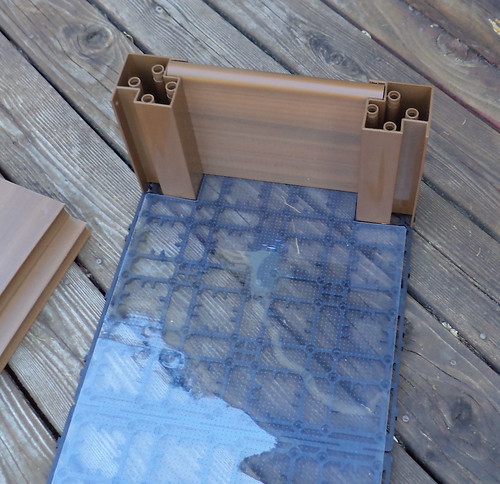
Here you can see one of the sides in place. The plastic sheet goes over the bottom. It acts like landscape fabric in that it lets water drain out while keeping dirt in and weeds out. It just lies on top of the base.
The walls are held in place by pegs.
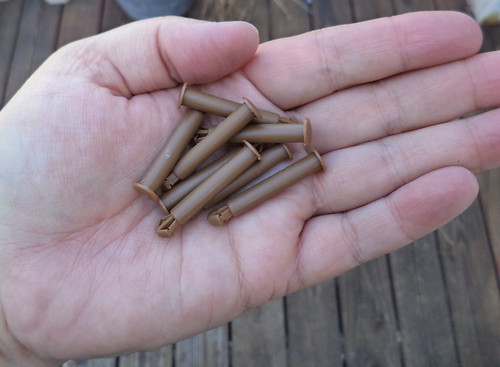
One of the tools you need is a rubber mallet. This was the part which was the most frustrating. You need to line up holes in the wall with holes in the end posts, insert a peg and pound in the peg. I tried to do this while the bed was on the deck railing but until the sides are anchored, the bed would fall apart.
You can see on the far right corner, one of the peg holes. It can be really tough for me to a) get down on the ground and then b) get up once I'm down there. Some comedian did a visual joke about that. He fell to the ground and a friend offered to help him get up. His response, "Wait. Wait. I'm seeing what else I can do now that I'm down here." There are days when that's exactly how I feel. I wound up sitting down and pounding the pegs into the holes. Here is the bed with the sides on.
The last things to attach are the end caps. They needed a light tap with the hammer to snap into place.
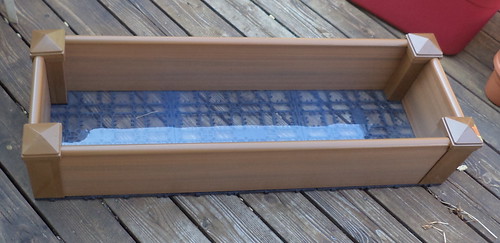
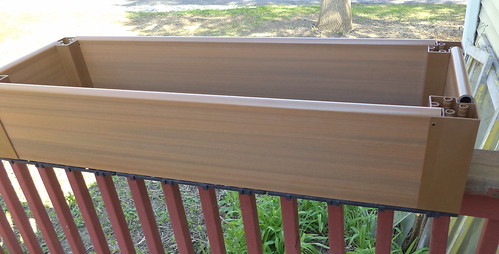
Once completed, it's rather light-weight and very sturdy. It was easy to carry it to the location where it's going to go. Here's the finished and filled product.
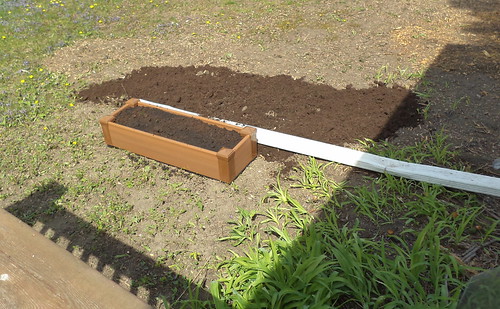
I'm very pleased with it. I'll be posting photos of what I planted in the box. The cats weren't interested in the cardboard box, surprisingly. I think it might have been too big. I wound up cutting it into pieces and recycling it. I will be getting another this coming March and putting it on the other side of the downspout. This would be a great raised bed for small spaces, including decks.
Beverage: Water
Deb
I like it!
ReplyDeleteNancy and the kitties